How to Take a Milk Sample for Culture Testing
Introduction
Taking a milk sample for culture and sensitivity testing is crucial for identifying mastitis pathogens and ensuring proper treatment. Proper sampling techniques are essential to avoid contamination and ensure accurate results. In this guide, we will walk you through the step-by-step process of collecting a milk sample, emphasizing the importance of aseptic techniques and the proper submission of samples to veterinary laboratories.
Why Milk Sample Culture Sensitivity is Important
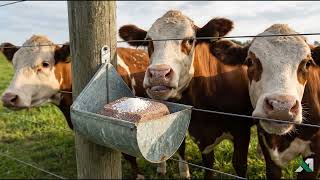
A milk sample culture sensitivity test is instrumental in diagnosing mastitis, an inflammation of the mammary gland. Understanding which pathogens are present allows for targeted treatment, which can reduce antibiotic use and promote better health in your dairy herd. Proper testing helps identify the right antibiotics for treatment, ensuring that farmers can manage mastitis effectively while maintaining milk quality and safety.
Preparing for Sample Collection
Before collecting the milk sample, it is essential to prepare adequately. Here are some key steps to follow:
- Gather Your Supplies: You will need sterile containers (preferably those provided by the vet lab), alcohol wipes, and gloves.
- Choose the Right Time: Sample milk during the milking process to ensure the best quality sample.
- Check Cow Health: Ensure that the cow is healthy and free from any visible infections before sampling.
Step-by-Step Guide to Aseptic Sampling
Following proper aseptic techniques is vital to prevent contamination during the collection process. Here is how to do it:
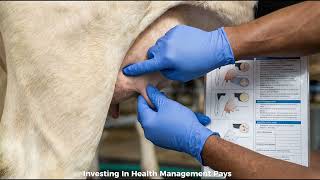
1. Prepare the Udder
Start by cleaning the udder thoroughly. Use an alcohol wipe to clean the teats, which helps eliminate bacteria that could contaminate the sample. Wipe each teat with a new alcohol wipe to ensure maximum cleanliness.
2. Wear Gloves
Put on disposable gloves to avoid introducing any contaminants from your hands into the milk sample. This step is crucial for maintaining the integrity of the sample.
3. Collect the Sample
Once the teats are clean, you can begin to collect the milk sample. Follow these steps:
- Remove the cap from the sterile container.
- Use your thumb and index finger to gently squeeze the teat to release the first few drops of milk, discarding them to clear the teat of any contaminants.
- Position the sterile container under the teat and collect approximately 10-15 ml of milk. Ensure that the container does not touch the udder or teat during this process.
- Cap the container immediately after collecting the sample to prevent contamination.
4. Label the Sample
Clearly label the sample with the cow's identification, date, and time of collection. This information is vital for accurate testing and follow-up.
Transporting the Sample
Once you have collected the milk sample, it is important to transport it to the veterinary lab promptly. Here are some tips:
- Keep Cool: Store the sample in a cooler or insulated bag to maintain a temperature between 0-4°C. This helps preserve the viability of the bacteria for accurate testing.
- Avoid Delays: Submit the sample to the veterinary lab as soon as possible, ideally within 24 hours. Delays can lead to changes in bacterial populations and compromise test results.
What Happens Next?
After submission, the veterinary lab will perform culture and sensitivity testing on your milk sample. This process will identify the specific pathogens present and determine which antibiotics are effective against them. Understanding the results will guide you in selecting the appropriate treatment strategy for your dairy cow.
Conclusion
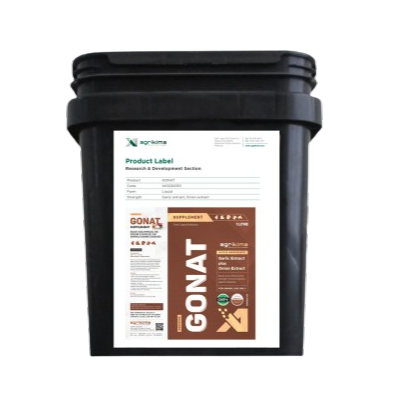
Taking a milk sample for culture and sensitivity testing is a critical step in managing mastitis and ensuring the health of your dairy herd. By following aseptic sampling techniques and promptly submitting samples to a veterinary lab, you can facilitate accurate mastitis pathogen identification and effective treatment decisions. Remember, quality veterinary products and supplements from Agrikima can also support animal health and improve overall milk production.
Final Tips
- Consistently monitor your herd for signs of mastitis.
- Invest in quality veterinary products to support overall cow health.
- Maintain accurate records of milk samples and lab results for better management.
Your message to the team
Read more
- Guidelines for Collecting Milk Samples for Bacterial Culture — Food and Agriculture Organization of the United Nations
- Milk Sample Collection for Mastitis Diagnosis — Michigan State University Extension
- Mastitis: How to Collect a Milk Sample for Culture — Government of Manitoba
- Milk Sampling Procedures for Mastitis Diagnosis — Dairy Australia